The 8 coolest, best hotels in Paris right now
Not sure where to stay during your next trip in the City of Lights? Here is a list of the best hotels in Paris, from fancy Saint-Germain to hip Bastille, and everywhere inbetween. I’ve curated a list of trendy properties that make a real effort to offer visitors a truly memorable home-away-from-home experience with thoughtfully-designed rooms, ideal locations close to famous landmarks, and an irresistible je ne sais quoi in their overall product.
Bonne nuit!
< €200 = €
< €300 = €€
> €400 = €€€
(Pssst… if hotels aren’t your thing, I curated a list of Paris Airbnb apartments for you)
Hôtel Le Square Louvois
12 rue du Louvois / 2e arrondissement / €€€


Nestled on a quiet street in the heart of this bookish district, Hôtel Square Louvois is an Art Deco 4-star boutique property with just 50 rooms steeped in the purest Haussmanian tradition.
Likewise, in a nod to its neighbour, Bibliothèque nationale de France Richelieu, literature is omnipresent at Hôtel Square Louvois. In fact, the open spaces of its lobby and rooms are filled with books and portraits of famous Parisian authors. Additionally, large French-style windows open to full size on the adjacent leafy, green square.
Hôtel La Parizienne
33 boulevard du Montparnasse / 6e arrondissement / €€

La Parizienne is a 3-star boutique hotel (just shy of 30 rooms) driven by the spirit of a Parisian woman: vibrant, chic, and poetic. The rooms are modest in size but feature luxurious toiletries and bedding, for a wonderfully comfortable stay.
The colourful hotel is just a stone throw’s from Montparnasse, shopping-driven Rennes area as well as Jardin du Luxembourg. Consequently, ask for a room facing Boulevard du Montparnasse for stunning views of the eponymous tower, especially striking at sunset.
+
PARIS travel tips
Hôtel National Arts & Métiers
243 rue Saint-Martin / 3e arrondissement / €€€


Right in the heart of everything worth seeing (notably the winebars, the restaurants, and the bookshops of Place de la République), this stunning hotel is truly for city lovers.
The recently opened property features stunningly designed rooms with accents of green velvet and modern artwork, not to mention the quaint French balconies and terrazzo bathrooms. Free buffet breakfast and yoga classes every morning, a rarity in Paris. The on-site restaurant is hemmed by a local celebrity chef; in addition, also check out the rooftop terrace for an exclusive bird’s eye view of Paris.
Hôtel Panache
1 rue Geoffroy-Marie / 9e arrondissement / €€

Looking for the trendiest, best hotels in Paris? This Instagram sensation (have you seen those headboards?) actually holds more than meets the eye. The property oozes style, character and cool and has become a bit of a rendezvous for locals in need of a stiff drink after work.
The 40 rooms are bright and feature touches of vintage, Bauhaus decor; if you’re visiting for a special occasion, ask for room 703 with its rooftop views and romantic corner bath. However, if Hôtel Panache is fully booked, check out its sister properties: Hôtel Bienvenue and Hôtel Paradis.
Hôtel Opéra Richepanse
14 rue du Chevalier de Saint-Georges / 1er arrondissement / €€

The recently-renovated 4-star Hôtel Opéra Richepanse is not to be outdone, with almost 400 years of history. Indeed, Russian composer Piotr Tchaïkovski was a regular guest in the late 1800s and wrote several letters to his family gushing about the property.
The room decor alone, with a contemporary colour palette and attractively appointed furniture, was a winner in my book. Moreover, the location close to Madeleine métro station is ideal if you’ll be exploring various areas of Paris.
+
PARIS travel tips
Hôtel Providence
90 rue René Boulanger / 10e arrondissement / €€

Set in the trendy 10e arrondissement, this hotel is housed inside a 19th century townhouse just a short walk from romantic Canal St-Martin. Therefore, it’s one of the best located hotels in Paris.
Bejewelled in lavish fabrics, unique objets d’art and superbly crafted bespoke details (those metro tiles in the bathroom!), this is a luxury lifestyle hotel that lives up to its promise. The pièce de résistance is the marble-topped cocktail bar made to measure for each room, accompanied by a step-by-step guide showing guests how to mix their own cocktail. Breakfast is included.
Hôtel Le Walt
37 avenue de la Motte Picquet / 7e arrondissement / €€

This is the perfect hotel for you if you’re more of the out-and-about-by-day, quiet-night-in-after dinner
type, thanks to a tranquil neighbourhood. But truth be told, who’d trade crowded bars for quiet views of the Eiffel Tower?
In other words, Hotel Le Walt offers just that with a classic Rive Gauche vibe. The Eiffel Tower is not only within sight: it’s also within walking distance! The hotel focusses on paintings of the last century along with a lovely garden terrace. Make sure to ask for a room with a view before you book.
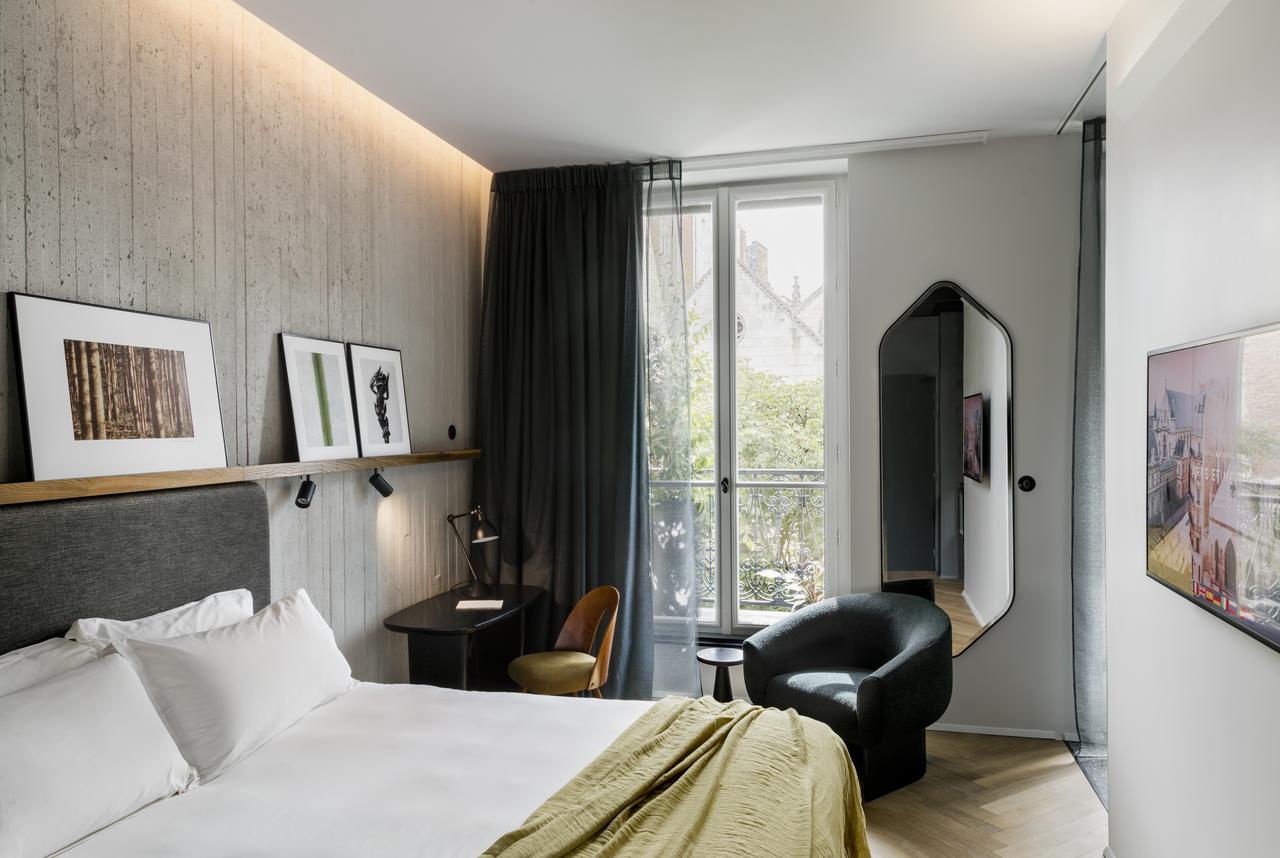
The Hoxton
32 rue du Sentier / 2e arrondissement / €€

If you’re familiar with the brand, you’ll inevitably love their French property which is arguably one of the best hotels in Paris. Famous for their lively bars & restaurants, the Hoxton hotels are popular spots for locals and visitors alike, especially the adjoining courtyards where rosé is heavily served.
All bedrooms comprise chevron timber floors (à la Haussmannienne), elegant cornicing, slick contemporary tiled bathrooms with copper fixtures. Most importantly, the property features the distinctive edgy-vintage vibe inherent to the Hoxton brand (think Roberts radio and Formica, for instance) and has become the coolest hotel in all of Paris, largely in part due to its Instafamous staircase and rococo façade. In short, an excellent option for a great night’s sleep and a très cool factor!